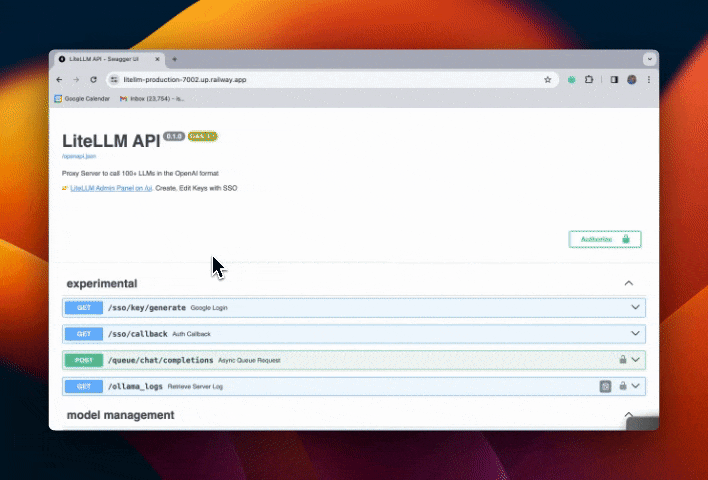
✨ SSO for Admin UI
SSO for UI
Step 1: Set upperbounds for keys
Control the upperbound that users can use for max_budget, budget_duration or any key/generate param per key.
litellm_settings:
  upperbound_key_generate_params:
    max_budget: 100 # Optional[float], optional): upperbound of $100, for all /key/generate requests
    budget_duration: "10d" # Optional[str], optional): upperbound of 10 days for budget_duration values
    duration: "30d" # Optional[str], optional): upperbound of 30 days for all /key/generate requests
    max_parallel_requests: 1000 # (Optional[int], optional): Max number of requests that can be made in parallel. Defaults to None.
    tpm_limit: 1000 #(Optional[int], optional): Tpm limit. Defaults to None.
    rpm_limit: 1000 #(Optional[int], optional): Rpm limit. Defaults to None.
** Expected Behavior **
- Send a
/key/generaterequest withmax_budget=200 - Key will be created with
max_budget=100since 100 is the upper bound
Step 2: Setup Oauth Client
- Okta SSO
- Google SSO
- Microsoft SSO
- Generic SSO Provider
- Add Okta credentials to your .env
GENERIC_CLIENT_ID = "<your-okta-client-id>"
GENERIC_CLIENT_SECRET = "<your-okta-client-secret>"
GENERIC_AUTHORIZATION_ENDPOINT = "<your-okta-domain>/authorize" # https://dev-2kqkcd6lx6kdkuzt.us.auth0.com/authorize
GENERIC_TOKEN_ENDPOINT = "<your-okta-domain>/token" # https://dev-2kqkcd6lx6kdkuzt.us.auth0.com/oauth/token
GENERIC_USERINFO_ENDPOINT = "<your-okta-domain>/userinfo" # https://dev-2kqkcd6lx6kdkuzt.us.auth0.com/userinfo
GENERIC_CLIENT_STATE = "random-string" # [OPTIONAL] REQUIRED BY OKTA, if not set random state value is generated
GENERIC_SSO_HEADERS = "Content-Type=application/json, X-Custom-Header=custom-value" # [OPTIONAL] Comma-separated list of additional headers to add to the request - e.g. Content-Type=application/json, etc.
You can get your domain specific auth/token/userinfo endpoints at <YOUR-OKTA-DOMAIN>/.well-known/openid-configuration
- Add proxy url as callback_url on Okta
On Okta, add the 'callback_url' as <proxy_base_url>/sso/callback

- Create a new Oauth 2.0 Client on https://console.cloud.google.com/
Required .env variables on your Proxy
# for Google SSO Login
GOOGLE_CLIENT_ID=
GOOGLE_CLIENT_SECRET=
- Set Redirect URL on your Oauth 2.0 Client on https://console.cloud.google.com/
- Set a redirect url =
<your proxy base url>/sso/callback
https://litellm-production-7002.up.railway.app/sso/callback - Set a redirect url =
- Create a new App Registration on https://portal.azure.com/
- Create a client Secret for your App Registration
Required .env variables on your Proxy
MICROSOFT_CLIENT_ID="84583a4d-"
MICROSOFT_CLIENT_SECRET="nbk8Q~"
MICROSOFT_TENANT="5a39737
- Set Redirect URI on your App Registration on https://portal.azure.com/
- Set a redirect url =
<your proxy base url>/sso/callback
http://localhost:4000/sso/callback - Set a redirect url =
A generic OAuth client that can be used to quickly create support for any OAuth provider with close to no code
Required .env variables on your Proxy
GENERIC_CLIENT_ID = "******"
GENERIC_CLIENT_SECRET = "G*******"
GENERIC_AUTHORIZATION_ENDPOINT = "http://localhost:9090/auth"
GENERIC_TOKEN_ENDPOINT = "http://localhost:9090/token"
GENERIC_USERINFO_ENDPOINT = "http://localhost:9090/me"
Optional .env variables The following can be used to customize attribute names when interacting with the generic OAuth provider. We will read these attributes from the SSO Provider result
GENERIC_USER_ID_ATTRIBUTE = "given_name"
GENERIC_USER_EMAIL_ATTRIBUTE = "family_name"
GENERIC_USER_DISPLAY_NAME_ATTRIBUTE = "display_name"
GENERIC_USER_FIRST_NAME_ATTRIBUTE = "first_name"
GENERIC_USER_LAST_NAME_ATTRIBUTE = "last_name"
GENERIC_USER_ROLE_ATTRIBUTE = "given_role"
GENERIC_USER_PROVIDER_ATTRIBUTE = "provider"
GENERIC_CLIENT_STATE = "some-state" # if the provider needs a state parameter
GENERIC_INCLUDE_CLIENT_ID = "false" # some providers enforce that the client_id is not in the body
GENERIC_SCOPE = "openid profile email" # default scope openid is sometimes not enough to retrieve basic user info like first_name and last_name located in profile scope
- Set Redirect URI, if your provider requires it
- Set a redirect url =
<your proxy base url>/sso/callback
http://localhost:4000/sso/callback - Set a redirect url =
Default Login, Logout URLs
Some SSO providers require a specific redirect url for login and logout. You can input the following values.
- Login:
<your-proxy-base-url>/sso/key/generate - Logout:
<your-proxy-base-url>
Here's the env var to set the logout url on the proxy
PROXY_LOGOUT_URL="https://www.google.com"
Step 3. Set PROXY_BASE_URL in your .env
Set this in your .env (so the proxy can set the correct redirect url)
PROXY_BASE_URL=https://litellm-api.up.railway.app
Step 4. Test flow
Restrict Email Subdomains w/ SSO
If you're using SSO and want to only allow users with a specific subdomain - e.g. (@berri.ai email accounts) to access the UI, do this:
export ALLOWED_EMAIL_DOMAINS="berri.ai"
This will check if the user email we receive from SSO contains this domain, before allowing access.
Set Proxy Admin
Set a Proxy Admin when SSO is enabled. Once SSO is enabled, the user_id for users is retrieved from the SSO provider. In order to set a Proxy Admin, you need to copy the user_id from the UI and set it in your .env as PROXY_ADMIN_ID.
Step 1: Copy your ID from the UI
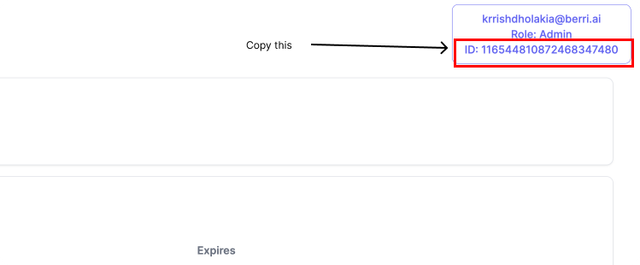
Step 2: Set it in your .env as the PROXY_ADMIN_ID
export PROXY_ADMIN_ID="116544810872468347480"
This will update the user role in the LiteLLM_UserTable to proxy_admin.
If you plan to change this ID, please update the user role via API /user/update or UI (Internal Users page).
Step 3: See all proxy keys

If you don't see all your keys this could be due to a cached token. So just re-login and it should work.
Disable Default Team on Admin UI
Use this if you want to hide the Default Team on the Admin UI
The following logic will apply
- If team assigned don't show
Default Team - If no team assigned then they should see
Default Team
Set default_team_disabled: true on your litellm config.yaml
general_settings:
  master_key: sk-1234
  default_team_disabled: true # OR you can set env var PROXY_DEFAULT_TEAM_DISABLED="true"
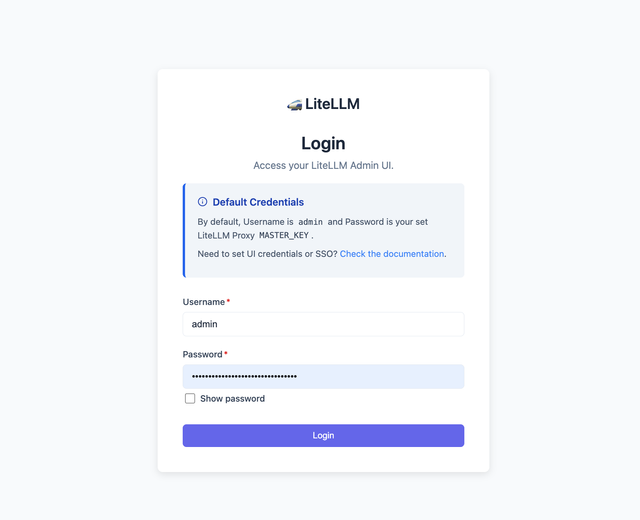
Use Username, Password when SSO is on
If you need to access the UI via username/password when SSO is on navigate to /fallback/login. This route will allow you to sign in with your username/password credentials.
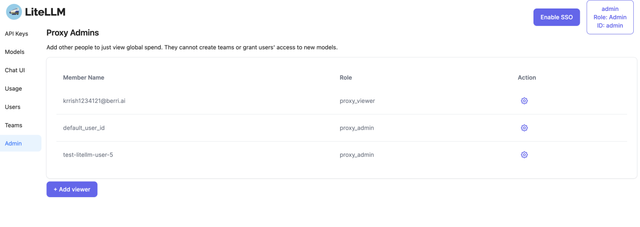
Restrict UI Access
You can restrict UI Access to just admins - includes you (proxy_admin) and people you give view only access to (proxy_admin_viewer) for seeing global spend.
Step 1. Set 'admin_only' access
general_settings:
    ui_access_mode: "admin_only"
Step 2. Invite view-only users
Custom Branding Admin UI
Use your companies custom branding on the LiteLLM Admin UI We allow you to
- Customize the UI Logo
- Customize the UI color scheme

Set Custom Logo
We allow you to pass a local image or a an http/https url of your image
Set UI_LOGO_PATH on your env. We recommend using a hosted image, it's a lot easier to set up and configure / debug
Example setting Hosted image
UI_LOGO_PATH="https://litellm-logo-aws-marketplace.s3.us-west-2.amazonaws.com/berriai-logo-github.png"
Example setting a local image (on your container)
UI_LOGO_PATH="ui_images/logo.jpg"
Set Custom Color Theme
- Navigate to /enterprise/enterprise_ui
- Inside the
enterprise_uidirectory, rename_enterprise_colors.jsontoenterprise_colors.json - Set your companies custom color scheme in
enterprise_colors.jsonExample contents ofenterprise_colors.jsonSet your colors to any of the following colors: https://www.tremor.so/docs/layout/color-palette#default-colors
{
    "brand": {
      "DEFAULT": "teal",
      "faint": "teal",
      "muted": "teal",
      "subtle": "teal",
      "emphasis": "teal",
      "inverted": "teal"
    }
}
- Deploy LiteLLM Proxy Server
Troubleshooting
"The 'redirect_uri' parameter must be a Login redirect URI in the client app settings" Error
This error commonly occurs with Okta and other SSO providers when the redirect URI configuration is incorrect.
Issue
Your request resulted in an error. The 'redirect_uri' parameter must be a Login redirect URI in the client app settings
Solution
1. Ensure you have set PROXY_BASE_URL in your .env and it includes protocol
Make sure your PROXY_BASE_URL includes the complete URL with protocol (http:// or https://):
# ✅ Correct - includes https://
PROXY_BASE_URL=https://litellm.platform.com

# ✅ Correct - includes http://
PROXY_BASE_URL=http://litellm.platform.com

# ❌ Incorrect - missing protocol
PROXY_BASE_URL=litellm.platform.com
2. For Okta specifically, ensure GENERIC_CLIENT_STATE is set
Okta requires the GENERIC_CLIENT_STATE parameter:
GENERIC_CLIENT_STATE="random-string" # Required for Okta
Common Configuration Issues
Missing Protocol in Base URL
# This will cause redirect_uri errors
PROXY_BASE_URL=mydomain.com

# Fix: Add the protocol
PROXY_BASE_URL=https://mydomain.com
Fallback Login
If you need to access the UI via username/password when SSO is on navigate to /fallback/login. This route will allow you to sign in with your username/password credentials.
Debugging SSO JWT fields
If you need to inspect the JWT fields received from your SSO provider by LiteLLM, follow these instructions. This guide walks you through setting up a debug callback to view the JWT data during the SSO process.
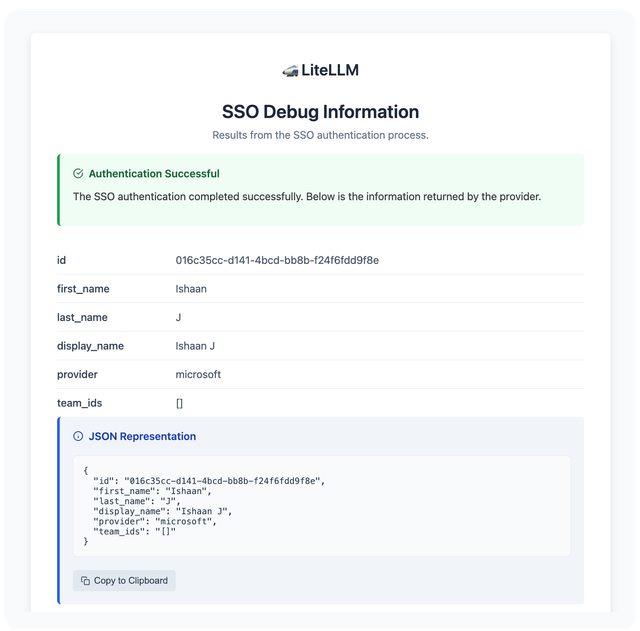
- Add
/sso/debug/callbackas a redirect URL in your SSO provider
In your SSO provider's settings, add the following URL as a new redirect (callback) URL:
http://<proxy_base_url>/sso/debug/callback
-
Navigate to the debug login page on your browser
Navigate to the following URL on your browser:
URL to navigate tohttps://<proxy_base_url>/sso/debug/loginThis will initiate the standard SSO flow. You will be redirected to your SSO provider's login screen, and after successful authentication, you will be redirected back to LiteLLM's debug callback route.
-
View the JWT fields
Once redirected, you should see a page called "SSO Debug Information". This page displays the JWT fields received from your SSO provider (as shown in the image above)